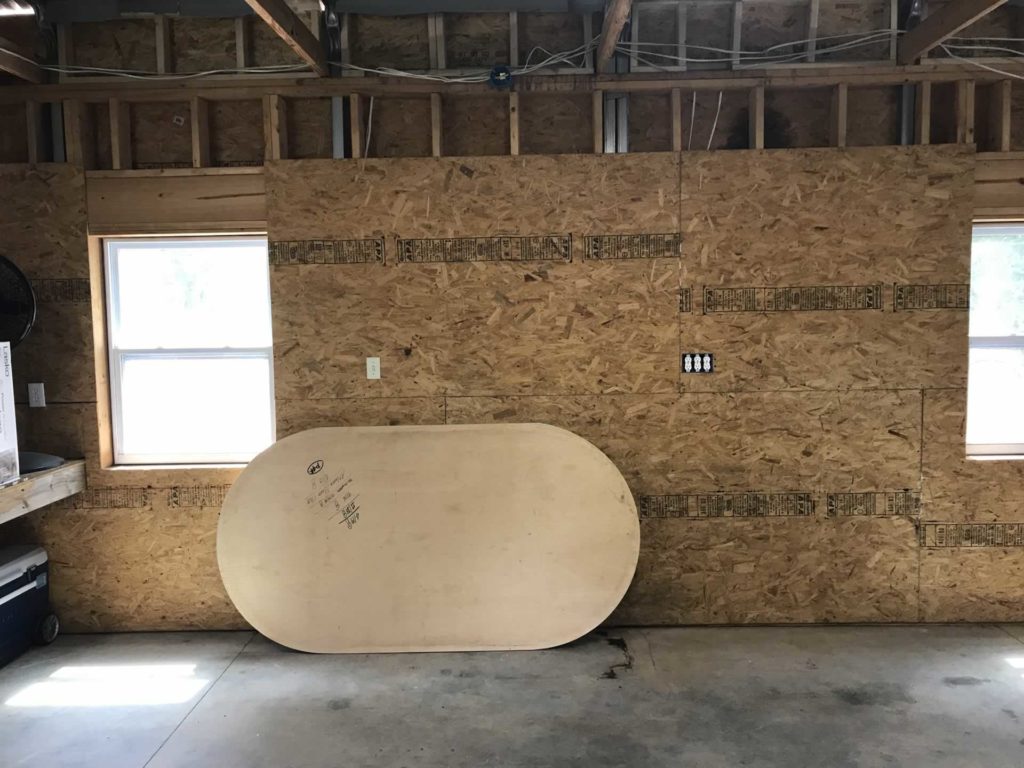
Go From Something Like This
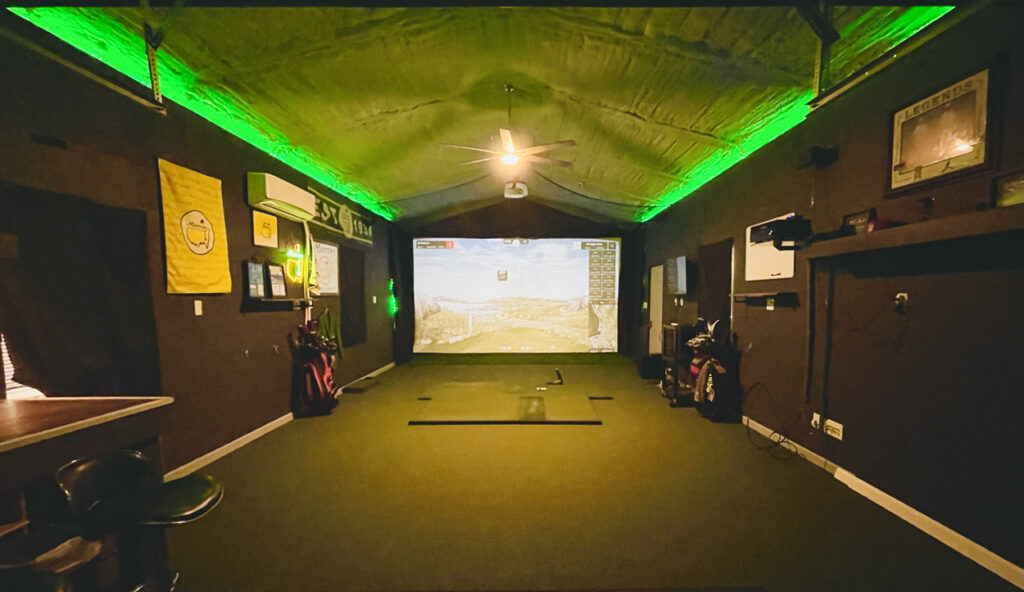
To Something Like This

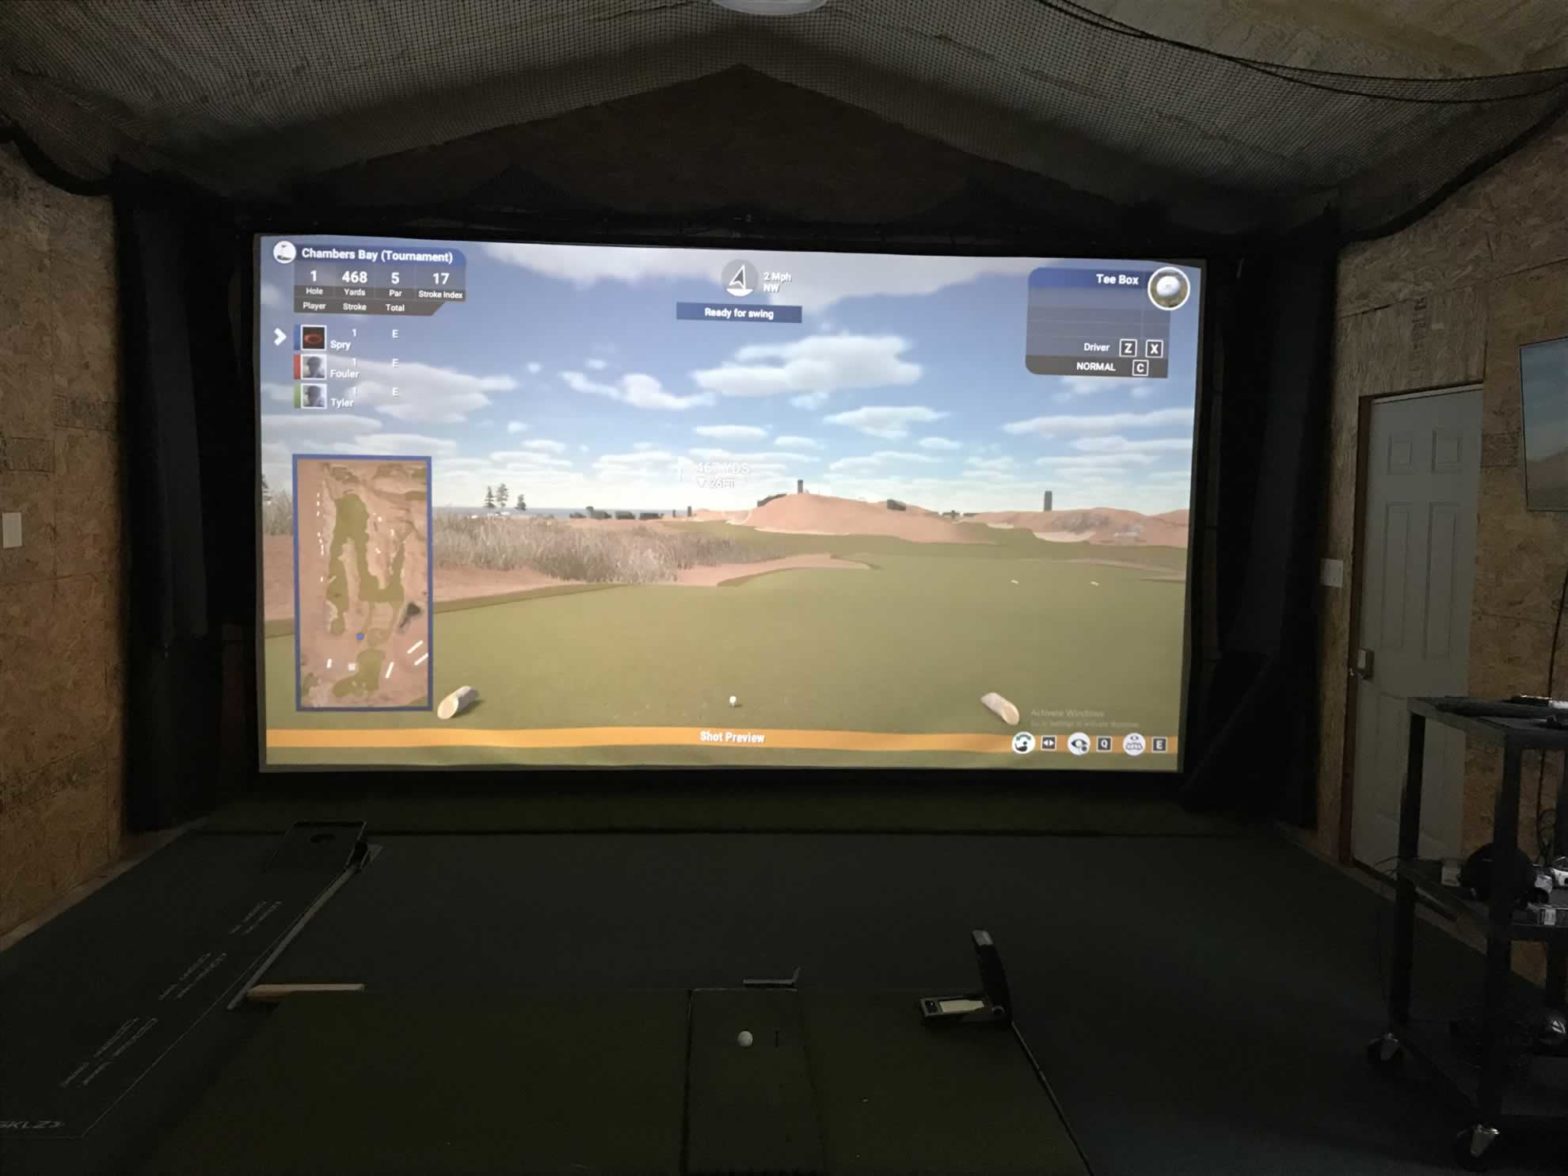
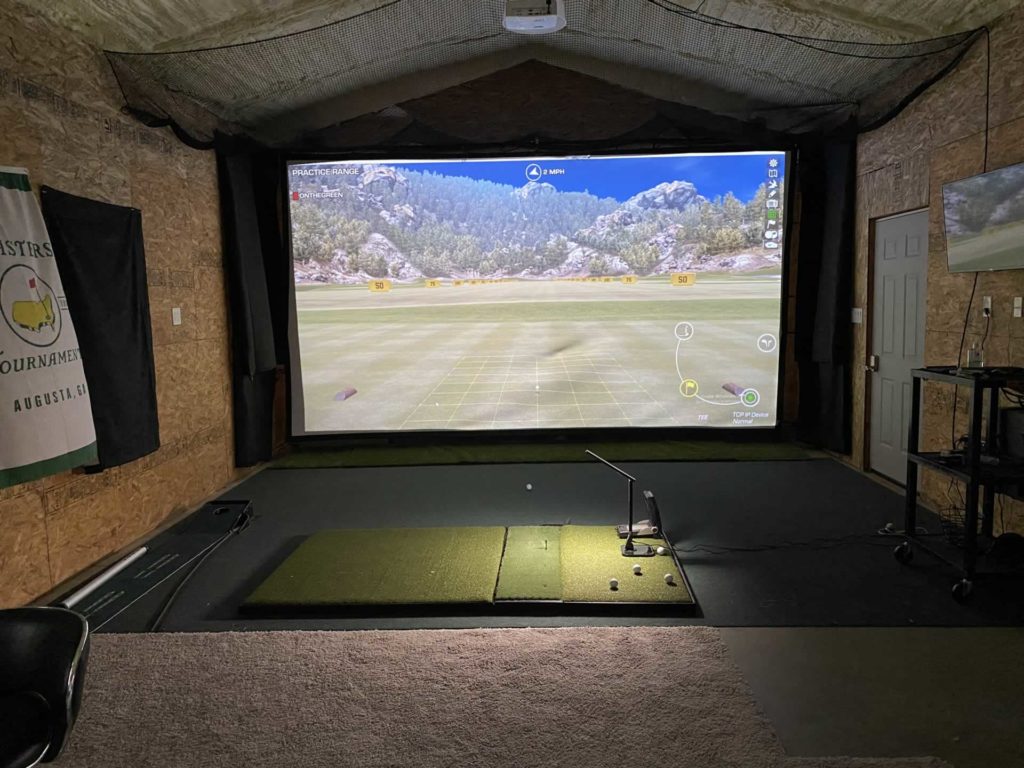
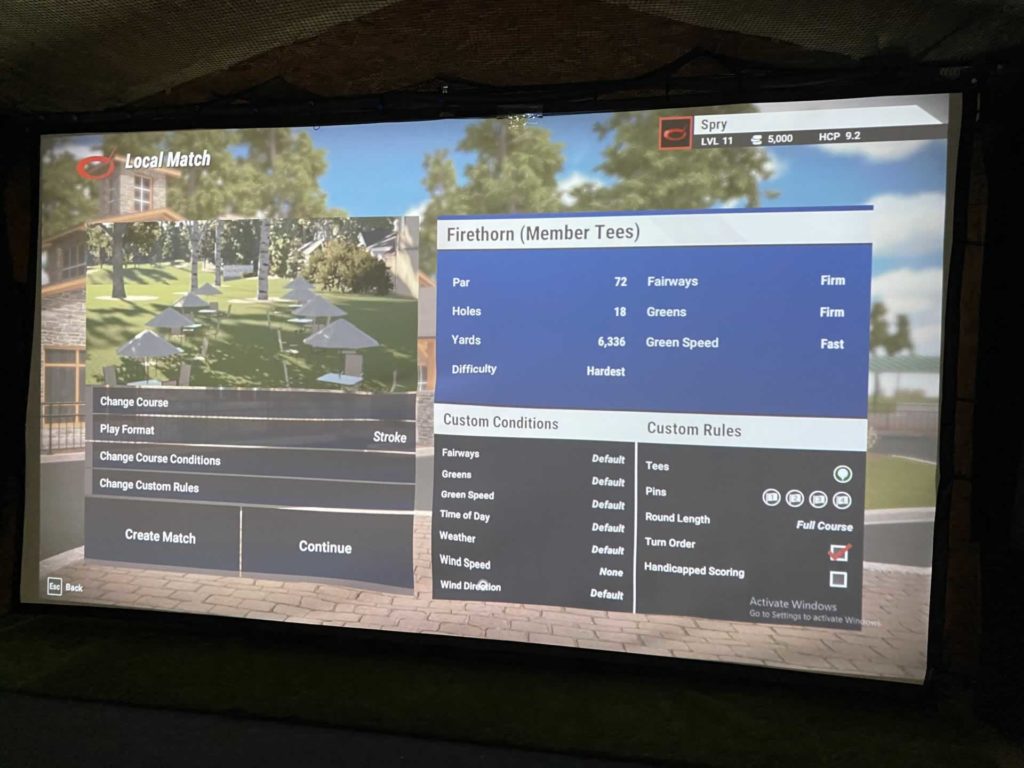
To Playing On Something LikeThis:
How To Build Your Own Home Golf Simulator
You can go simple or complex when building out your golf sim. You can go cheap or expensive. I’m going to break down the different components you need in order to play simulator golf.
Let’s break down the major components of a golf simulator.
You need something to hit a golf ball into.
You need something to hit a ball from.
You need something to read the shot.
You need a computer and a software to run the game.
You need a way to display the game or app – monitor, projector/screen or TV.
So in a nutshell you need:
- Impact Screen, Enclosure or Hitting Net
- Hitting Mats
- Launch Monitor
- Software/Computer
- Projector, Monitor and or TV
You can build out a sim as big and bad as you want. I’ve seen shops that have multiple projectors and massive curved screens giving you a huge field of view with the latest and greatest software options and multi-sport abilities, automatic golf ball returns and auto-tee options with undulating putting surfaces.
Alternatively we’ve got guys hitting off of a piece of old carpet into a net.
Most of us are going to land somewhere in-between a simulator that Tiger Woods might build himself and the one Joe Dirt would put together in his front yard. Depending on how immersive and quality you want to go will determine how much everything costs.
Keep in mind that your space requirements (suggestions and best practices down below) and play requirements (specifically right and left handed both wanted) will influence your build out considerably.
Let’s take a quick look at the components and the major choices you have today with your build.
| Simulator Part / Piece | Brands, Products, Options |
| Launch Monitor | **See my Launch Monitor Guide – Launch monitors are much more affordable now! |
| Impact Screen & Enclosure | Carls Place Enclosure & Impact, NetReturn, Sporina Net if no screen needed. |
| Hitting Mat | Fiberbuilt, Carls Hotshot, SigPro Softy, Holy Grail (see my golf simulator mat comparison chart) |
| Sim Software | GSPRO (#1 choice by far) |
| Gaming PC | Need a good video card + fairly beefy build out for optimal performance |
| Projector | Tons of options, I like the Optoma short throws and the BenQ 4k Laser Golf Sim Projectors. |
Golf Simulators 101
I built my ‘do it yourself’ style home golf simulator in January of 2020. Over the past couple years I’ve been heavily involved with the world of indoor golf. I wanted to put together a ‘how to guide’ that has all of the major components of a golf simulator in an easy to read guide.
Today you can play golf from your home using your real clubs, real golf balls and real results. Here are the things you need to know the answer to in order to decide which kind of golf simulator setup is right for you.
In This Guide You’ll Find
- Golf simulator parts list
- Physical space requirements
- Links to what we purchased
- How much everything cost
- Links to reviews and more info where you can learn more and decide what is right for you
- How-to guides covering different steps of the golf sim build.
- A ‘things to consider’ before making a choice
- Video reviews of the items or how-to’s whenever possible
My DIY Golf Sim – Parts List
Here are the pieces and parts of my indoor golf sim at OnTheGreen.golf headquarters.
Remember I build my simulator in 2019 and launched it January of 2020, many of the launch monitors have brand new models and options available today. In late 2025 and early 2026 I built my new golf simulator! See it here and the changes I made after 6 years of having a simulator.
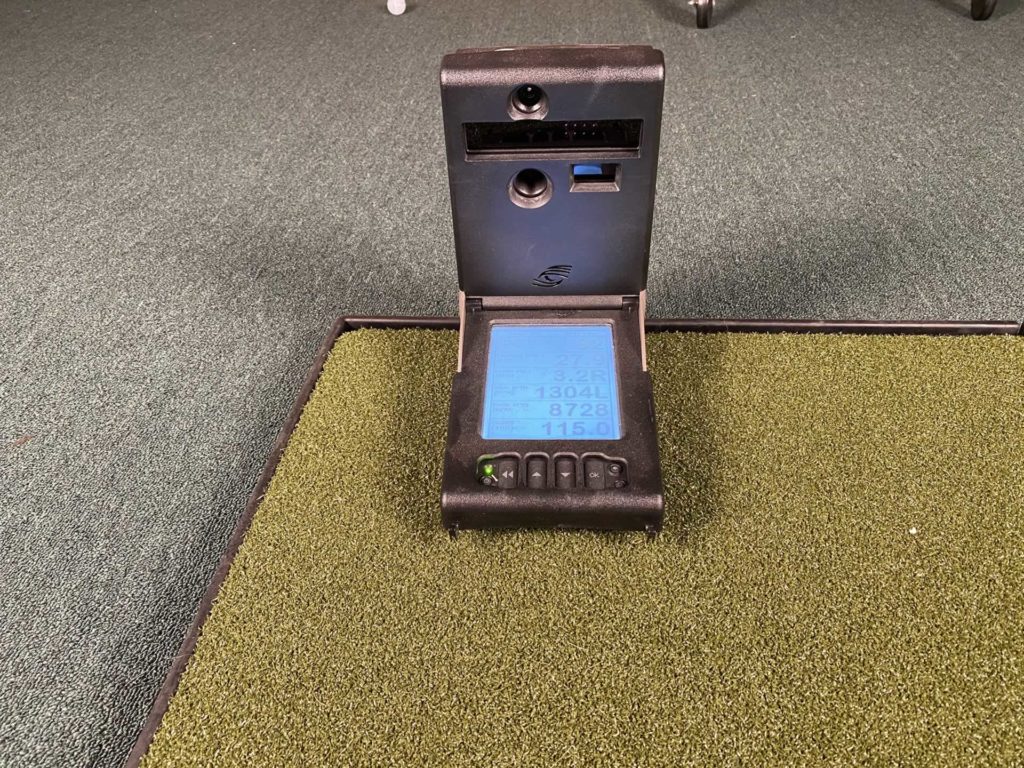
- Launch Monitor (GC2) (now the GC3) (see all entry to mid level launch monitors)
- Hitting Mat (Fiberbuilt 4×7 studio mat) *5 years later I’m now using the Carls Hotshot Golf Mat
- Impact Screen (Carls Place 16×9 with grommets *I did not build an enclosure altho many will. )
- Projector (Optoma GT1080HDR Short Throw Gaming Projector)
- Sim Software (TGC2019 + Protee GSX Interface and JNPG – Actually now I have upgraded to a better (and cheaper) software called GSPro that is only a small fraction of that price at $250 / year.
- Gaming PC (Custom Build)
- Safety Netting (Just For Nets Nylon Golf High Impact Net)
- Frame & Enclosure Parts and Pieces (1/2″ Steel Pipe, Eyelets, Ball Bungees, Moving Blankets)
- Led Adjustable Floor Lamp (Tenergy)
- Extra’s and add on’s (custom ramps, extra tee’s etc)
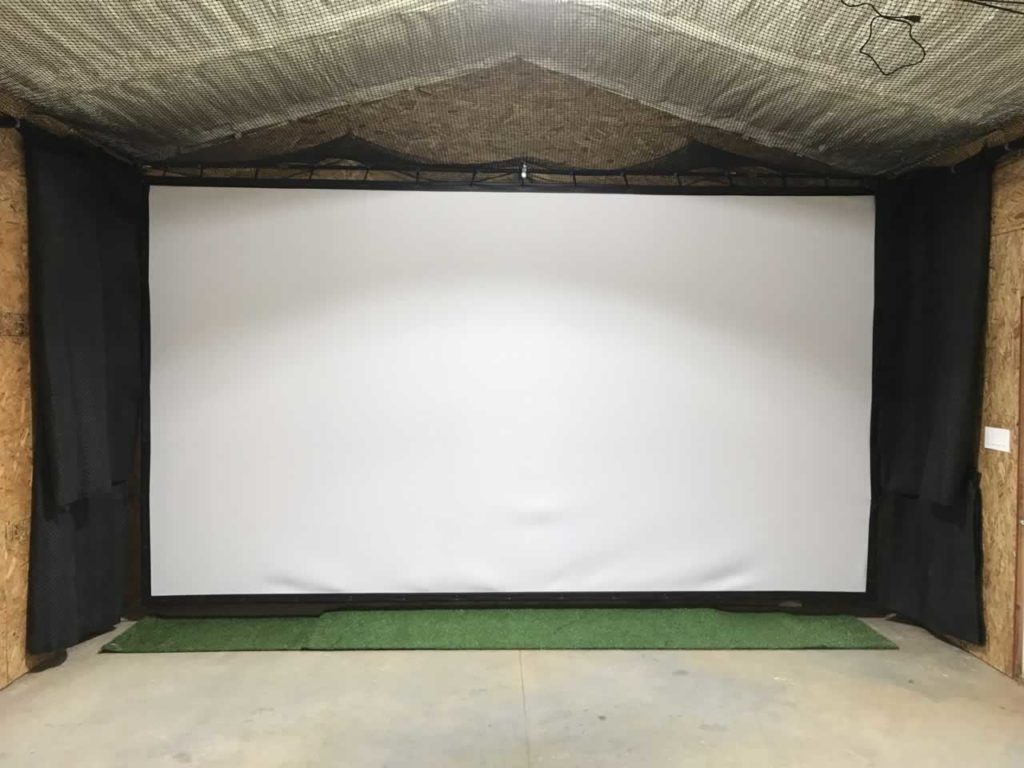
This is our simulator setup with the overhead lights on.
The meat of the system consists of the Fiberbuilt hitting mat, the GC2, Carls premium impact screen, TGC2019, a beefy gaming PC and an Optoma short throw projector, safety netting for the roof and just a low pile rug over concrete for the flooring. It’s not beautiful but it’s functional. The upgrades can come over time as budget allows.
The screen attaches directly to eyelets in the wall. We connected a half inch plumbing pipe 17.5′ wide across the top with support beam in the middle to keep the screen level. A lot of people build an enclosure instead of safety netting. If that’s you, this is a good guide from GunghoGolf on building an enclosure from EMT pipe.
The simulator is still a work in progress, but it works great.
We can fully play and enjoy the sim.
We have upgrades planned like better flooring, staining the walls, adding overhead spotlight, creating video stations and upgrading and adding to our accessories.
I will go over the entire build below, as well as talk about the different options we debated and considered for each part of the build. Hopefully our decision making process can help you figure out what you need to build a DIY home golf simulator yourself.
Space Requirements
Everyone is going to have different space requirements. How tall are you and how upright do you swing? Are you having righty’s and lefty’s playing? Do you want a radar based launch monitor (mevo+, flightscope or trackman) or photometric system like the Skytrak, GC2 or Uneekor?
Let’s take a look at the space requirements you need to meet for your own simulator.
Ceiling Height – Overhead
10 feet works great for most everyone. Of course your minimum requirement will depend on you and whoever is going to use the sim.
Here is how to figure out how low of a ceiling you can get away with.
- If you are not sure if your garage or basement ceiling will be high enough, the best way is to just get in there and swing your clubs and find out – remember your hitting mat will likely add a few inches
- If you smash your driver into the ceiling then you need a higher ceiling 😉
- 10′ ceiling works well for almost everyone. 9′ may work depending on person and swing.
- Don’t forget that your hitting mat will raise you another 2″ or so
- You will likely need to hang a projector from the ceiling somewhere above your head / hitting zone – this should be out of the way of your golf club but still should be a consideration
I”m 6’1 and I need a very minimum of 9’6″ to swing a full driver with my swing and feel comfortable. If I swung more upright I would need even higher. The higher ceiling the better but I know everyone has a minimum height requirement.
Here are my thoughts:
The higher the ceiling the better. In our sim we have a vaulted ceiling with over a 12′ peak. The projector hangs down to around 10 foot and there is plenty of room to swing away and follow through completely.
I tried swinging in a room with 9 foot ceilings and I would totally scrape the ceiling with my clubs in the follow through.
Most people are going to need a bare minimum of 9′ foot high ceilings and ideally 10′ ceilings for the vast majority of players. If you have 10 ft you should have plenty of swinging room without feeling cramped. Of course your height (and anyone who is using the sim’s) will determine your minimum ceiling height. If Paul Sturgess comes over to play you might want to go for an even higher ceiling.
Distance From Hitting Zone to Impact Screen
How far you have in front of you towards your impact screen matters. If you stand to close you could hit your screen with your clubs or more likely be in a ‘danger zone’ for ball ricochets and bounce backs from your screen.
Conversely if you are too far away your higher higher lofted clubs will fly over the top of your screen.
Most sim golfers would agree:
- 10 feet from golf ball to impact screen is ideal.
- 6 foot minimum for full follow through and acceptable bounce back risk
- Some launch monitors (mevo+ and other radar based) require at least 8 feet in front of golfer and 8 feet behind golfer to work properly and get accurate reads of the ball
- 9.5-11 feet will work and feel good for most setups
- The farther away you are from your screen, the higher you need the top of your screen to be if you want it to catch all your higher lofted shots.
- The top of our screen is 9.6′ high and all but the highest lofted ‘flop shot’ style wedges hit the screen. Those are caught by our netting attached at the top of our screen to the ceiling.
Is there an ideal distance from hitting zone to impact screen?
10 feet is my choice.
We had more room behind the screen if we wanted to move farther away but 10′ feels great.
9′ feels decent as well but 10 feet just made perfect sense in our sim.
The only slight issue is that the sand wedges hit like a flop shot will sometimes go over the top of the screen and hit the safety netting.
Our screen stands at 9’6″ tall. I consider that to be fairly high and only the highest lofted wedge shots have hit the netting. If we moved closer we could probably avoid this from happening but it’s so rare and the netting works as intended so it is not really a problem.
The launch monitor reads the high shots just fine, but it engages our safety netting because we miss the screen. If we hit from say 8 feet away then these would be much less of an issue, but then the ball wouldn’t fly as far from impact and we wanted some ball flight and some extra distance from the impact screen.
Your screen should be close enough where irons are not flying over the top of the screen. Anywhere from 8 to 11 feet is pretty good for the majority of simulators. The minimum distance I would hit from is 6 feet away. Hitting from 6′ would be if it is your only option and to me, especially after hitting from 10 feet away, 6-7 feet would feel cramped.
Space To The Sides of Hitting Zone – Room Width
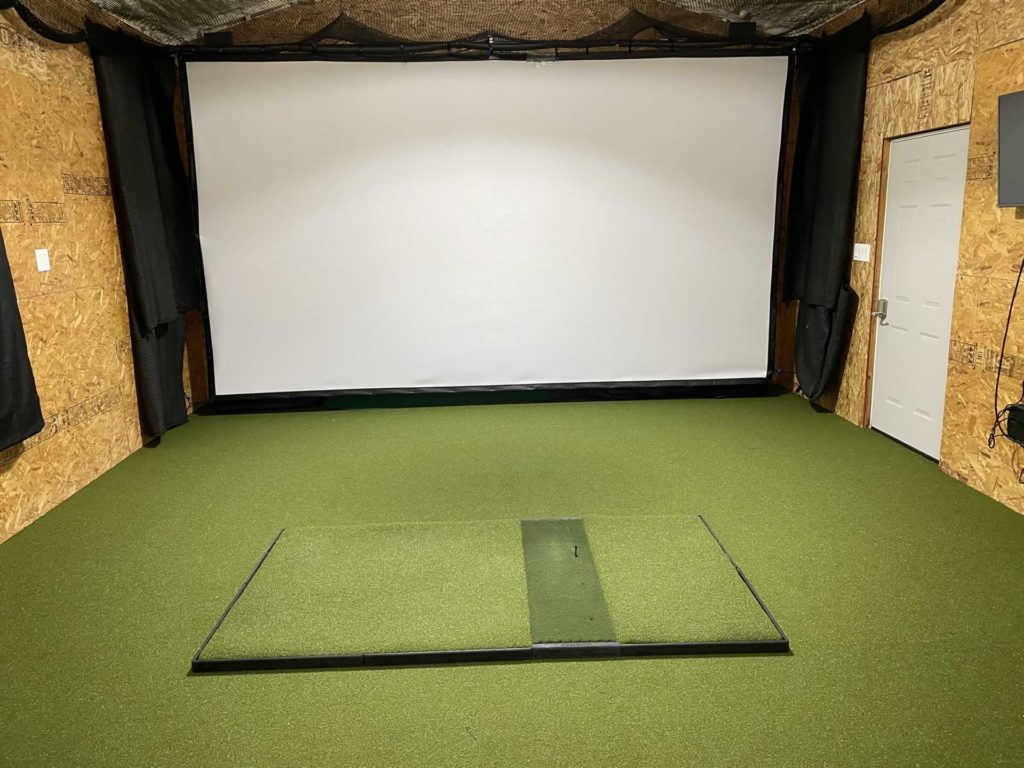
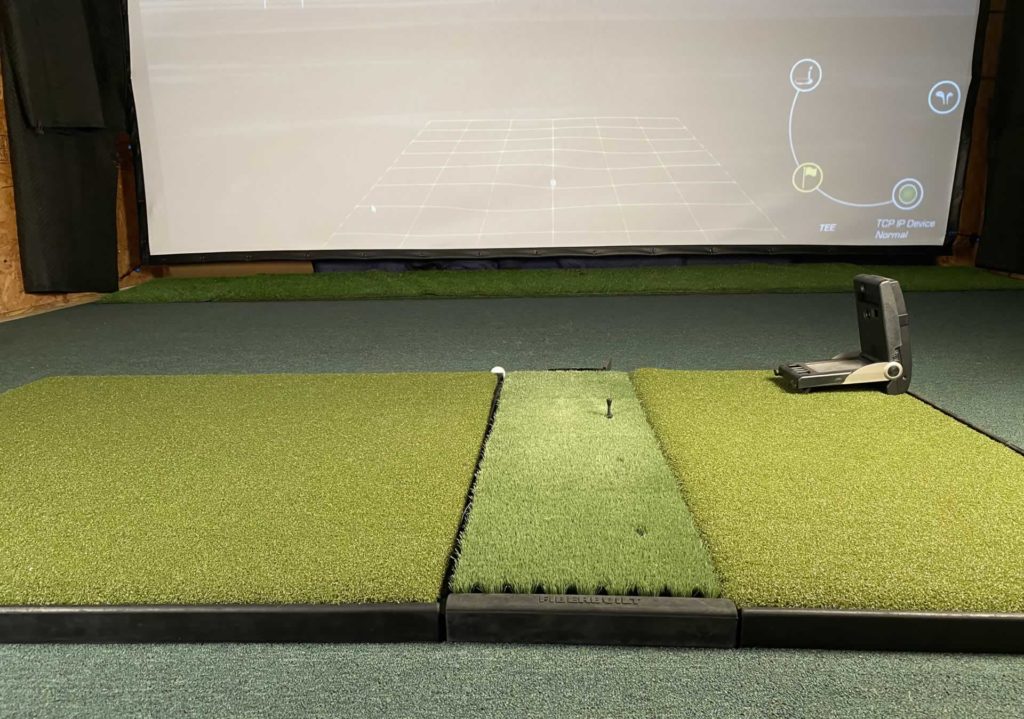
‘On The Green’. Room is 17.5′ wide. Tee is located in the center of the room.
There are a few considerations you need to decide how much room width you need.
If you will have right and left handed golfers then you will either need to have plenty of room on both sides of your hitting zone for players to stand and swing or you will need to have a movable hitting zone/mat setup.
- A basic rule of thumb is you want a minimum of a circle with a 6 foot radius around the golfer.
- That’s 12 feet front to back and side to side for a totally safe golf swinging area.
- You can get away with a smaller space in front of you (at address) if your sim users are only right handed golfers (or only left handed).
- Space behind golfer when at address – You want 6 feet behind the golfer is minimum for safety. You do not want to hit the back wall with a shallow backswing or downswing.
- One of our friends has a flatter backswing and his club comes the closest to our back wall.
- We have a 17’6″ wide room with the hitting zone in the center of the room at 8.8 feet from the side walls.
- Consider the golfer is standing a few feet away from the ball at address. That gives us 6 feet behind the golfer for backswings.
- Only the real flat swingers or people who stand super far away from the ball at address would get near the back wall if it is at least 6′ away from the golfer at address.
- In front of the golfer there is much less space requirements. You will need a few feet to the right of your hitting zone to setup your launch monitor. Other than that, you can deal with a wall in that space that is less than 6 feet overall. We pull up a rolling cart station and place it just off of the edge of the hitting mat where we use the keyboard or mouse when playing TGC2019. Point being is that you should more or less be able to swing without a ton of space directly in front of you at address. A few feet is fine.
- Off center hitting zones can be a possibility if you are all right handed (or all lefty’s) if your room width is smaller than you’d like.
The Swing Zone Behind The Golfer
The space I’m talking about now is to the right of a right handed golfer when standing at address.
- You need 6 feet behind the golfer to freely swing.
Keep this space clear for both backswings and downswings. You need a 6 foot radius of clear swinging area in almost all directions to have a full and non constrained swing just like you would have on the course.
The Space Above The Golfer – Ceiling Height Requirements
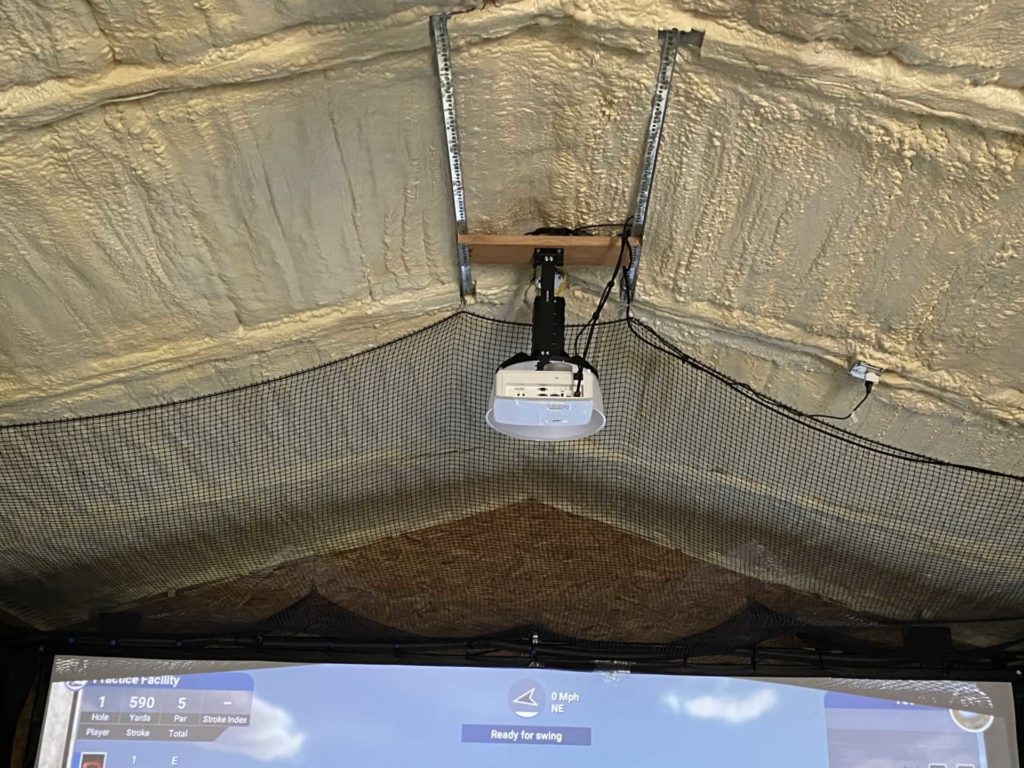
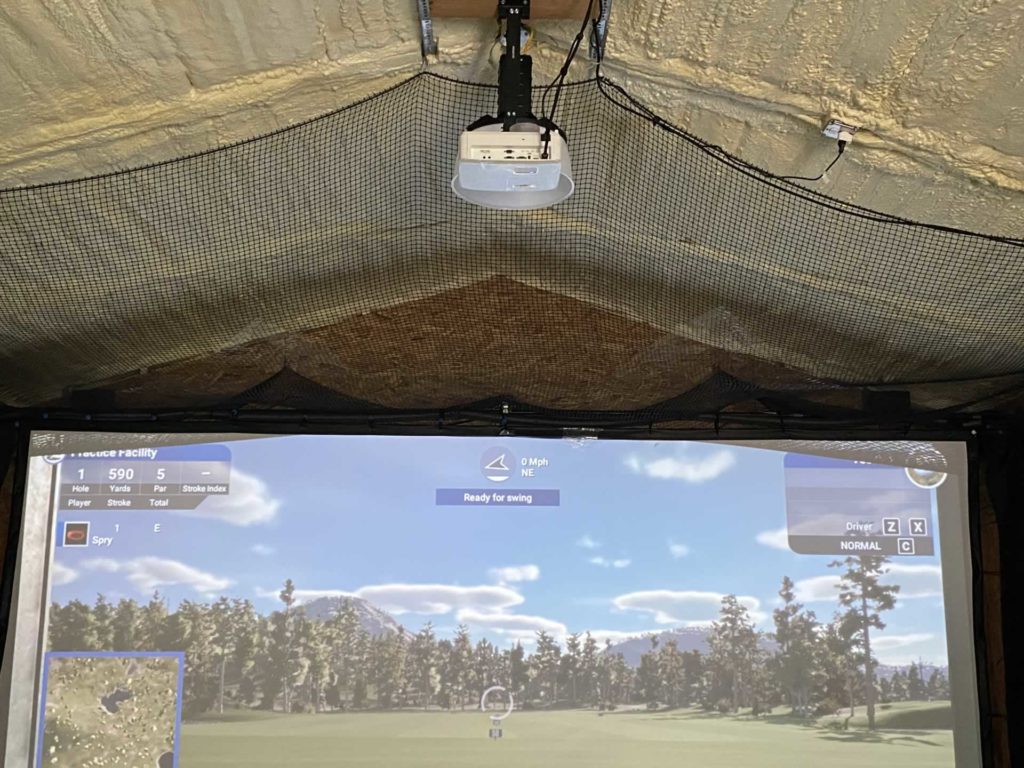
The space above you will be in play during the swing. The swing wraps around the body so there is space directly above the hitting zone that a club should not interfere with. A lot of simulators use this space to hang their projector.
The projector location is in play. Generally the projector is located directly above and in line with the hitting zone. It hangs directly above, slightly in-front of or behind the hitting zone. This space is clear from the swing path.
Hang your projector as high as you can to avoid both the potential of hitting it as well as minimizing shadows that it might cause if it is behind you. Our projector hangs about 1 foot in front of our hitting zone and the base of the projector is just 10′ high. You will need to confirm the height of the projector to the height of your screen.
You do not want the projector too far behind you as it will throw shadows on the screen as you are standing there and swinging. Floor mounted projectors are options as well, just get a protective shield as it is in the line of fire.
Your Launch Monitor – $599 to $10k+
I think choosing your launch monitor is one of the most vital decisions you will make when building your golf sim. There are a lot of considerations when choosing a launch monitor. See my full launch monitor guide.
- What’s your Budget
- What technology? Photometric or radar
- Who’s playing? Right handed and left handed golfers needed
- How much space is available
- Where will you use it? Indoor and outdoor needs and wants
- What do you want it to do? Just simulator or head measurement technology, club fitting and more professional requirements
- Usability, performance and enjoyment factor
- Software desires
Launch Monitors
| Launch Monitor | Retail | Tech | Location | HMT | Software |
|---|---|---|---|---|---|
| Launch Monitors | COMPARE | See all | Compare Today’s Golf Launch Monitors | ||
| Garmin r10 | $599 | Radar | Ground – behind HZ | NO | GSPro (no putting), Garmin App |
| Skytrak | $1995 | Photometric | Ground – near HZ | No | TGC2019, WGT, e6, GSPro |
| Mevo+ | $1995 | Radar | Ground – behind HZ | No | TGC2019, e6, GSPro |
| GC3 | $6500 | Photometric | Ground – near HZ | Add-On | FSX2020, TGC2019, GSPro, GSPro |
| GCQuad | $12,000 | Photometric | Ground – near HZ | Yes | FSX2020, FSX, GSPro |
| Uneekor | $10000 | Photometric | Ceiling – in front of HZ | Yes | TGC2019, e6, GSPro |
Entry Price Point = Skytrak vs Mevo+ – $2k
Entry level of accurate launch monitors come in with the Skytrak and the Mevo+. These are both about $2k. There are some additional costs with Skytrak for their game improvement plan and on-going costs. Mevo+ comes with a handful of courses and you can upgrade your software to include more at a later date.
I do not have either of these launch monitors, however I researched the Skytrak heavily before purchasing the GC2. The Mevo+ was not yet on the market when I built my sim, but if it was I would have strongly considered going with it as it seems like a quality system that is faster than Skytrak.
*check my latest golf sim launch monitor guide – new options are available at lower price points ($599 retail)
Mid Price Point = GC3 vs Uneekor – $6-$10k
The Foresight GC3 and the Uneekor make up the middle ground of professional quality launch monitors. The GC3 comes in around $7500 fully unlocked or you can buy the same unit branded under the Bushnell Launch Pro that comes with yearly subscriptions based on your needs. The GC2 is now only available on the secondary market like ebay. The GC2 is known as the gold standard for indoor launch monitors. It’s the one I bought for the system here at my simulator. You can add a club head measuring technology to capture the clubhead data as well as ball data. I do not have this piece yet (nor plans to anytime soon) as it is another $4000 on top.
The Uneekor was just coming out when I was researching launch monitors. It is an overhead based launch monitor. The early reviews from around the web are mostly positive. Cool things seem to be the video playback options as well as being an accurate system. They have two overhead models. The “QED” and the EyeXO which is the latest and greatest version. With the QED you need to use marked balls. You can buy these from Bridgestone and Titleist Pro V1 models.
The company seems committed to improving the product line. Here is their PDF that covers a lot of information. I also recommend Harry Brandt’s facebook group as Harry has been an early tester of the QED system and shares a lot of info about the Uneekor brand in his FB group. You can see all of our golf sim groups and societies here for more info.
A new launch monitor from FullSwing is due out within 6 months for around $4000 and is supposed to be of high quality.
Higher End – $10k+ Launch Monitors
These are the professional grade systems. PGA pro’s, industry professionals and rich old dudes.
GCQuad, Trackman, Flightscope Xi, GCHawk, Uneekor EyeXO.
I don’t know too much about these as they were way out of my budget.
What Tech? Photometric or Radar?
Radar takes more room and works best outdoors. Photometric works best indoors and takes less room. However the photo based Skytrak and GC2 launch monitors sit near the impact zone and get in the way of dual-handed golfers. Radar units like the Mevo+ sit behind the golfers allowing for easy use of both right and left handed players. As well as being out of the danger zone from hozel rockets or shanks off the toe.
Impact Screen – $500-$1200
There are a small handful of selections when it comes to impact screens. The most recommended resource I came across in my research was for the Carls Golf Impact Screen.

In that review I’ve linked up a handful of competitors as well as a way to get an impact screen on the cheap if you are willing to wait for it utilizing a ‘direct from the mill’ thread over on the golf sim forums.
The main things to consider with your impact screen are:
- Durability
- Looks
- Function
- Sound
Of course you want a screen that is as durable as possible. You are going to be launching golf balls into it upwards of 150 MPH (or more). Carls premium is designed to take up to 250MPH ball speeds so it should handle all you got, hoss.
Safety Netting And Enclosures – $100-$5000
Your build will likely use an enclosure as you have to have something to connect your screen to on all sides. These are costly, but a necessity in many setups. My setup here at OTG did not require that investment. We hung our screen and connected directly to the wall via eyelets and bungie cords and it hung from a pipe across the top that also connected directly to the wall. Instead of an enclosure we hung this safety netting across the ceiling and above the screen.
Most people build enclosures out of EMT (electrical metallic tube) conduit that you can buy from Home Depot or Lowes. The guy over at GunghoGolf has a good guide on building a DIY enclosure that will fit a 16′ by 9′ screen. Check it out here. You can see an enclosure price calculator if you want to have a Carls place build it for you and send it to you for assembly.
You want protection above the screen and depending on how wide it is, on the sides as well. In our setup we are using a 16′ wide screen and only a time or two have balls hit our sidewalls that are protected by moving blankets in 6 months of play. Our safety netting above the screen has taken shots on the regular… usually a couple per round! Get protection above your screen. Especially if you are hitting from 10′ away. If you build an enclosure you should be able to put some baffles or netting up top to protect your ceiling.
Hitting Mat – $200-$1000+
The short answer is that your hitting mat is important.

When I began reading about playing on a home golf simulator I started finding reports of people injuring their elbows, wrists and shoulders from hitting off of cheaper hitting mats. Injury was the last thing I wanted because I planned to use the simulator on a very regular basis.
The general consensus was to invest into your hitting mat. It’s an integral piece of your simulator.
This mindset led me to purchasing a Fiberbuilt that I’m somewhat happy and somewhat disappointed in. It feels great to hit off of but it comes apart from the stance area and the hitting strip. No injuries or pain hitting on it at all though.
The main players in the hitting mat products are:
- Fiberbuilt
- Truestrike
- Divot Action
- Hitting Mat Section of the sim forums
- Turf Factory Direct – used by many community members
Simulator Software – $1k one time price or subscription.
There are a small handful of golf simulator software options. Here they are:
After playing sim golf for over three years, my favorite sim software is GSPro. It’s what my friends and I personally play on as we compete in the simulator golf tour on a near weekly basis.
- TGC2019 – The Golf Club 2019
- JNPG – Jack Nicklaus Perfect Golf (going only to Trackman users in August 2020)
- e6 Connect
- FSX2020 – Foresight Sports exclusive software for their launch monitors
- GSPro -*it is out and awesome, see my ultimate GSPRO review and my original GSpro download guide for details
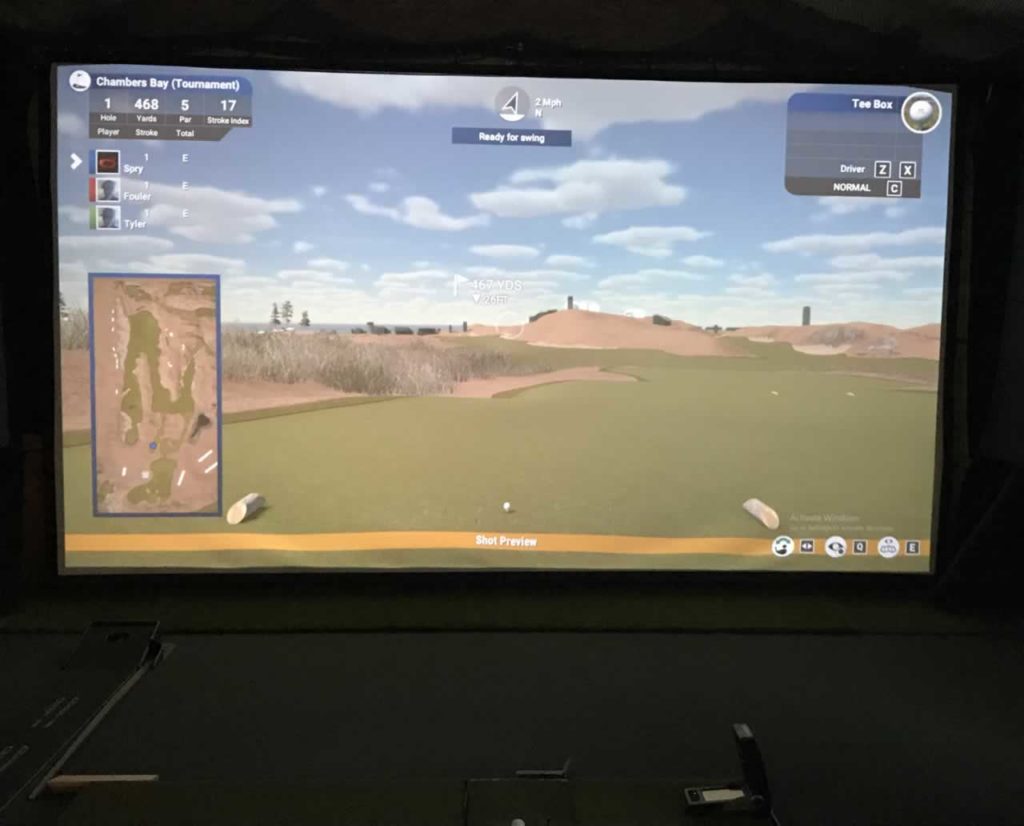
This is a photo of TGC2019 course selection. It might or might not be a recreation of one of the most famous golf courses in the world. The one in the southern town in Georgia where all the Masters of the game go to play.
I’m reviewing the different software options as I get personal experience with them. Currently you can see that I love and hate TGC2019. I’m planning on purchasing the new GSPro as soon as it is available to the public and comparing them in-depth. I’m hopeful I will like it even more than TGC2019.
The GSPro software is a new software coming out from the guys who are running the Simulator Golf Tour. It’s initial schedule is due for release sometime in August 2020. It is more or less meant to be a replacement for JNPG as that software was acquired by Trackman and will be exclusive to them at the end of August. You can get the details of this by visiting the Simulator Golf Tour social channels found on our societies page.
Gaming PC and Projector – $ Variable
I’m putting these two together under one topic because there is so much information and so many more experts than me to help share this research. I honestly left this to my more technical minded computer friend and he built out a badass gaming PC for me to use.
Computer system questions of the forum and a projector area.
I recommend the Projector Central throw calculator to help you figure out your size and space requirements.
Accessories – Tee’s and More
There are some pretty cool accessories I am seeing for personal golf simulators. Here are a few I’m going to see about getting.
Birtees – only get the dark color ones as the white ones will sometimes confuse the launch monitor.
Tee Claw Tee Holder – This little device attaches to your turf and you can then use a normal tee sticking it into it (don’t go in too far).
GolfControlBox – this guy built a box that sits next to your hitting area where you can use your clubs to press buttons that act as hotkeys for whatever software you are using. Easily aim, see overviews, take mulligans etc.
Putting It All Together
Ask yourself what you really want, what you really need and how much you are willing to invest.
New technology is coming out all the time and prices are coming down. It is a great time to get into this hobby. There are growing communities, forums and societies that are out there to help newbies get to swinging. Be sure you check out our page covering those groups to help get individual questions answered.
I plan to break down more parts and pieces of the golf sim build in my tips and guides content that will be published over the coming weeks, months and hopefully if you guys like it, years.
This guide shows you what I did and my thought process along the way. Home golf simulators are a red hot business right now.
The prices of good quality launch monitors and simulator software have came down enough to finally make it affordable for a larger portion of the population to invest in their own home golf sim.
This “Golf Simulators for Dummies Guide” will show you how to build your own golf simulator. With a moderate level of handyman skills you can build your own golf simulator this yourself or with the help of a couple buddies.