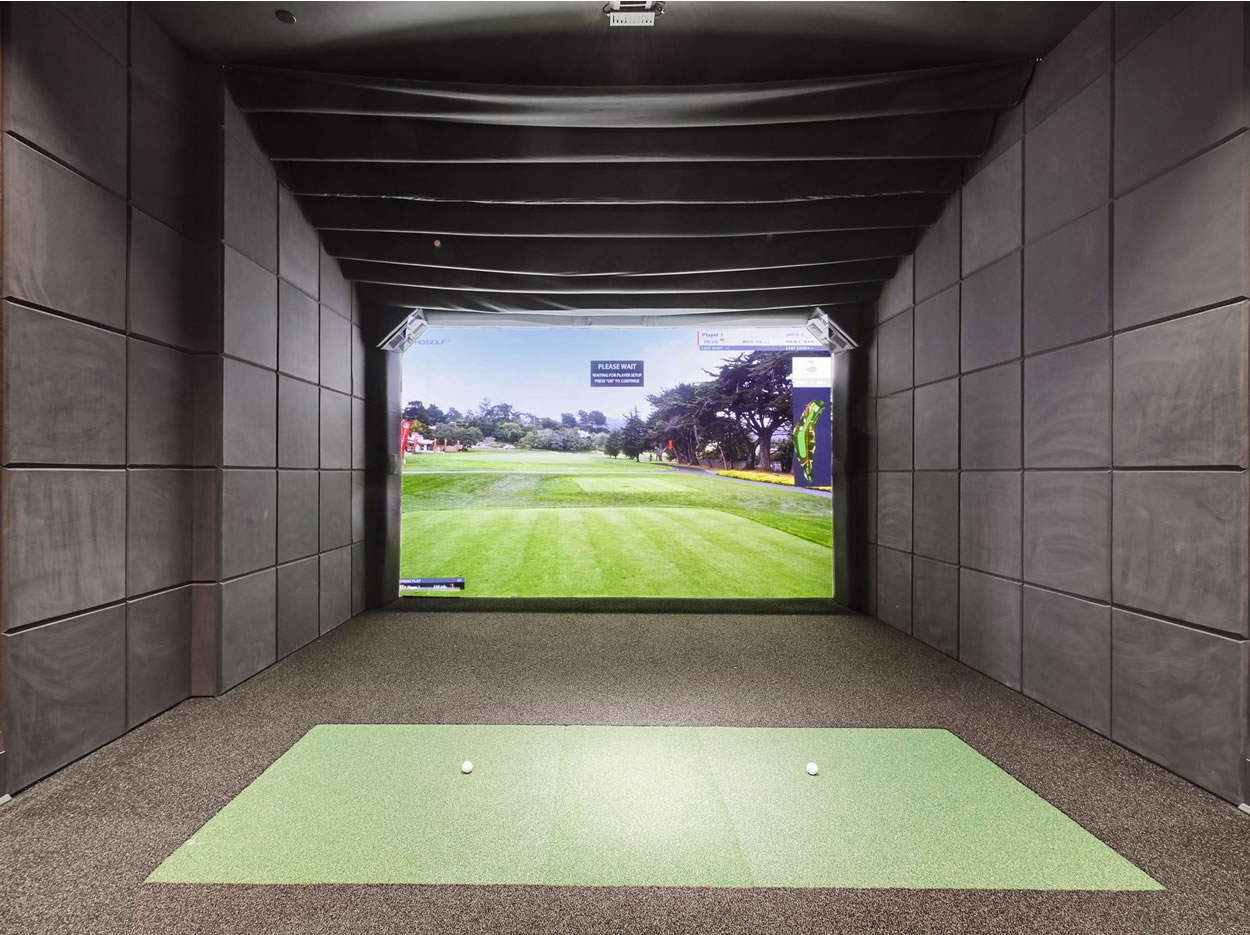
For those of us who do not use an enclosure and have side walls and ceilings near the top and sides of our impact screen, we need wall protection.
A shank wall if you will. It’s important if you care about minimizing your chances of getting hit from an errant golf ball.

You can reduce the chances of hitting yourself with the golf ball with proper wall protection, but the chances are never zero.
We need something to protect the walls and something for the ceiling. I’m talking wall padding, foam panels, netting, curtains, carpet or something along those lines to try and keep shanks from flying back at us with the force of a thousand suns, or smashing holes in my ceiling.
I am researching this for myself right now and that is why I am building this page. I do not have an answer as to what is the best golf sim wall padding or protection plan, but I know there are a ton of options.
I literally have not yet decided which solution I am going to implement for my new simulator that I am building as I am typing this. This page is a culmination of links and research I am in the process of doing.
Once I’ve done my research and compared my options I’ll pull the trigger and spend the money and or time to implement the wall padding solution.
Below, I’m linking to many of the different DIY golf simulator wall panels, padding and solution examples that I find across the internet that I will consider for my setup. This helps me visually see what my choices are and how they look if implemented. Also I’ll be sharing and saving any of the ‘top notch’ guides or how to posts in making your own wall padding or protection solution with a link below if I see them.
DIY Golf Sim Wall Panels Examples
*You need to join home golf simulator users group on Facebook to be able to see many of the links below. I searched discord, reddit and the golfsimulatorforums as well for links but many of the best examples I found that I couldn’t find else where were in that FB group. I linked up the best posts I found, I’ll update and add more as I find them so bookmark this page (Ctrl + D) and check back.
Justin’s golf sim build – detailed explanation on building his own wall panels using 2″ memory foam mattress toppers, 1/2″ osb and ottertex marine vinyl.
Ryan posts about foam recommendations for making a DIY panel. Cole answers with gluing the foam to 1/2″ plywood and then glued the marine vinyl to the foam. Plenty of detailed answers from Cole in the thread. Also Kent shares his solution using Mattress topper from Amazon and the Marine vinyl fabric.
Dayton’s DIY wall panel build using memory foam mattress topper and cutting to size.
Rob shows via video how he makes his wall padding with tips on how to get the wrinkles out of the DIY panels as well as how to do the corners of your panels which are a tricky part to get right.
This is just a picture but Ryan shows how he attached gym mats from amazon around his enclosure for an easy and relatively inexpensive solution.
Eddie asks for members to show off their wall and ceiling padding set ups and gets a ton of comments and examples. * In the comments, Brian shares high density foam tiles easy to cut and install from etsy from ‘HypedUpAcoustic’ first time I’ve seen that mentioned.
Jeff asks about using these gymnastics mats from Amazon and attaching them to the wall of his simulator and Chris shows how his looks with a similar setup.
If you are looking to attach panels to walls, I’ve seen beau clips recommended throughout multiple posts like this one on the forums.
jray521k uses high density foam from amazon which is a low cost option.
rossross shares his build that he titles for a ‘family of awful golfers’ where he makes a few mistakes with his padding but I love the way the finish looks.
cocolamb22 (golfwrx forum) asks for recommendations for cheaper wall padding / acoustics and Bridges shows off his setup with the cheaper acoustic foam.*I personally like the look of this for one of the inexpensive options. He put a half inch think foam sleep pad like this on the walls first and then added acoustic foam panels.
Gun_Safety_Dwight asks for wall panel DIY solutions on reddit and gets some examples and replies with acoustic tiles and some diy panel builds.
Wall Panel Retailers / Vendors
SIG Wall Panels – a favorite pre-built option from trusted source, ShopIndoorGolf. They also offer foam peel and stick wall panels as well as carpet panel gap pads to cover the in-between gaps of your screen and your enclosure if needed. Not to be a bearer of bad news, but according to Fabulous-Walk-891 he said they were expensive and not well built. DYOR.
Carls Place built in golf room options. You can put in carpet tiles, acoustic tiles or padded panels which you can find when you go to ‘build your own golf room. These are probably the most professional looking and high quality solutions on the market, but of course that comes with a price tag.
Impact Sports has three options for wall padding here. – I have no idea about the legitimacy of these guys but I saw someone who worked there post in one of the forums and they have some of the less expensive wall panels I’ve seen (they don’t look the best but to each his own).
GolfBays – They have a section on golf simulator room protection that has two options for wall padding, a 10 pack of upholstered acoustic tiles and a hexagon acoustic wall tiles for sound dampening. See those here.
Wall Panel Pros – not a golf related shop, but if you want wall panels, they got em.
GSA Golf – these guys have a ton of wall protection options available for purchase online which is awesome, however the website looks like it was built and coded in the early 2000’s. Whatever, they have multiple options like their stick on wall panels, hi-end acoustic fabric covered foam panels of a velvety suede type of feel they claim, low priced acoustic foam panels, flat low priced high density foam panels, flame retardant panels and look to focus on golf sim stuff like this.
Marine Vinyl Fabric has been mentioned multiple times as the goto source for more durable coverings for your DIY foam builds.
Shank Wall Protection – Other Options
Other than foam panels, on the walls you can do a few different things.
Curtains – heavy duty floor to ceiling curtains seem to work fairly well for most people, especially those who need a retractable simulator setup in their garage so they can still park their car. I plan to do a page like this on retractable golf simulator options and solutions and will link it as soon as it is done.
- SIGPRO Curtains – These curtains are heavy duty, come in three sizes for ceilings (10, 9, 8 feet) and offer an optional ceiling track for mounting the curtains on the ceiling if needed.
- Carls Place Curtains – Carls offers a nice design tool for your curtains to choose the height and then your curtain depth. They have all the accessories and things you need to make them look good and function well.
- Amazon – I searched for heavy curtains and there are of course hundreds upon hundreds of options and none of them looked great. So I searched for a more specific one recommended for golf and this heavy duty one popped up from CCS Chicago Canvas & Supply. There are some other options priced similarly as well as some cheaper options if heavy duty is not as important to you.
- Curtains from Peak Tarps – This company recommends their industrial polyester stage curtains.
Moving Blankets – This is what I hung on my plywood walls in my outbuilding for my first simulator build. It did a somewhat reasonable job of slowing down some shanks. Ugly but if you do not care, I do not care.
Mattress Toppers – buy a 2″ egg crate memory foam mattress topper or just a dense foam mattress topper and attach it to the areas you want protected. I saw this Foam Factory 3LB Memory foam topper that logically seems like it would work well to me.
Golf Netting – I used a golf net in my first simulator to help protect the ceiling. It did a moderate job of that but because I kept the net fairly close to the ceiling, balls would still hit into it pretty hard (Michael Scott meme). These seem like they would work fairly well for side-wall protection as long as you attached them to the ceiling and had a decent amount of overlap at the bottom as well has having a weighted bottom area. It’s the low worm burner shank you have to watch out for getting through these nets.
Gym Mats – I’m considering this as the least expensive option to protect my ceiling that can also look halfway decent in my setup if I can attach them to the ceiling correctly. I’ve seen some with ‘tabs’ on them with grommets that I can screw down into the plywood that should hold them to the ceiling and the wall.
Gym Flooring Tiles – these puzzle piece foam tiles would be cheap to put on the walls relatively speaking and I can secure them with screws and washers drilled directly into my plywood. I don’t think these are great for killing the ball though, a more memory foam style material would do better.
Acoustic Foam Tiles – I’m thinking thick foam egg crate foam or something similar for acoustics. I do not know how durable this would be, especially for the ceiling if shots are hit into it somewhat regularly
My Old Sim vs My New Sim
At my old simulator I just hung moving blankets on the side walls lol. It was ghetto but it got the job done. My space was big enough that the side walls were rarely hit. Except from one of my good buddies who puts the moving blankets to the test a few times during his rounds with errant shots. While there was the occasional loud bang as the ball hits the blanket and plywood wall behind it, the force of the shot was not sent careening back towards us.
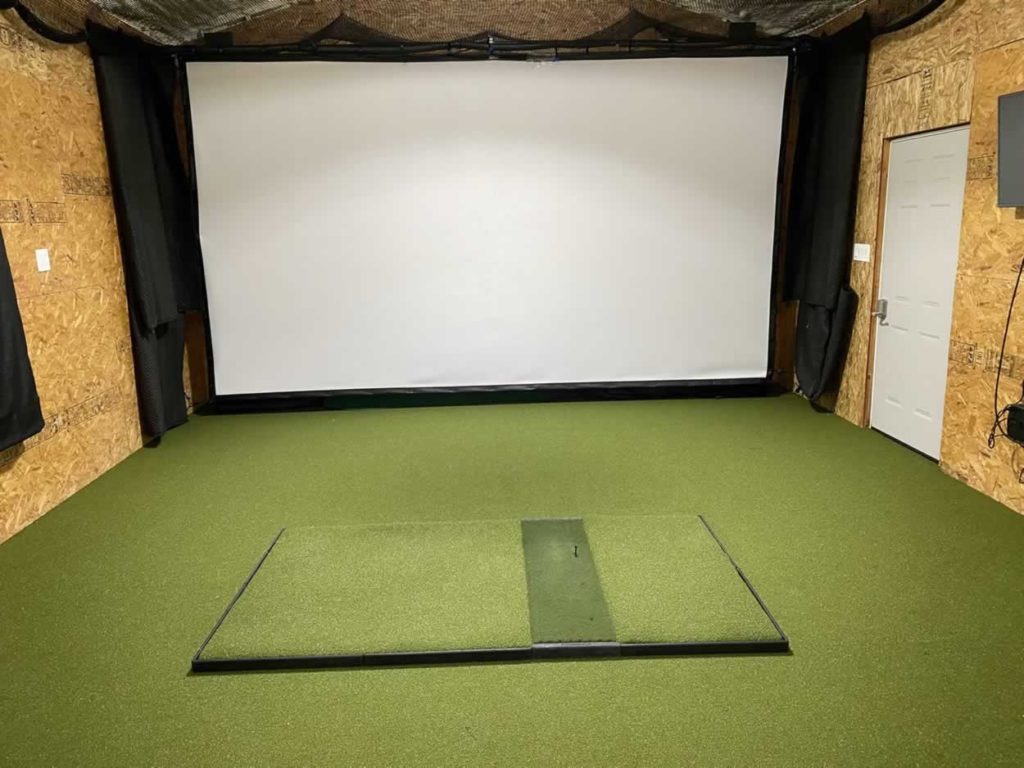
In my old simulator I protected my ceiling with golf netting. I had an arched ceiling that peaked at about 12′.
My screen was hung at about 9.5′ high and netting was in place that hung down and semi-sorta protected the ceiling from high hit shots.
If the ball had velocity, it pushed the netting up and still hit the ceiling, it just did not do much/any damage. We had the ceiling spray foamed and a metal roof. It worked ok… not great but we only had a few shots that really hit the spot with the least protection on the ceiling and got away with this setup.
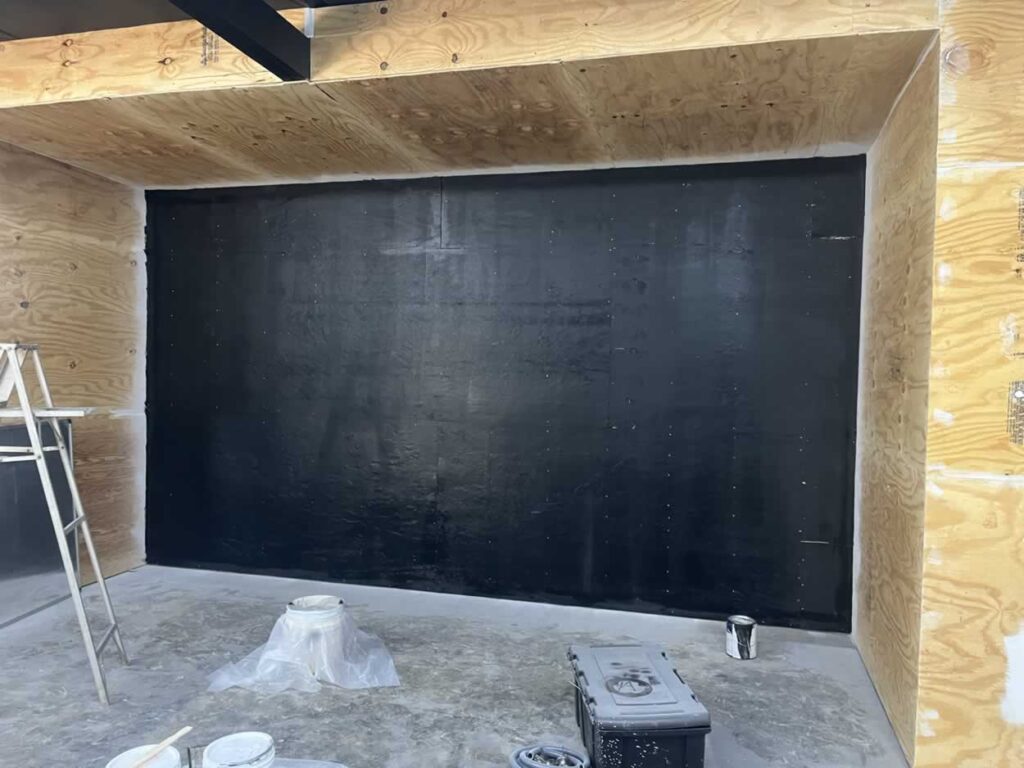
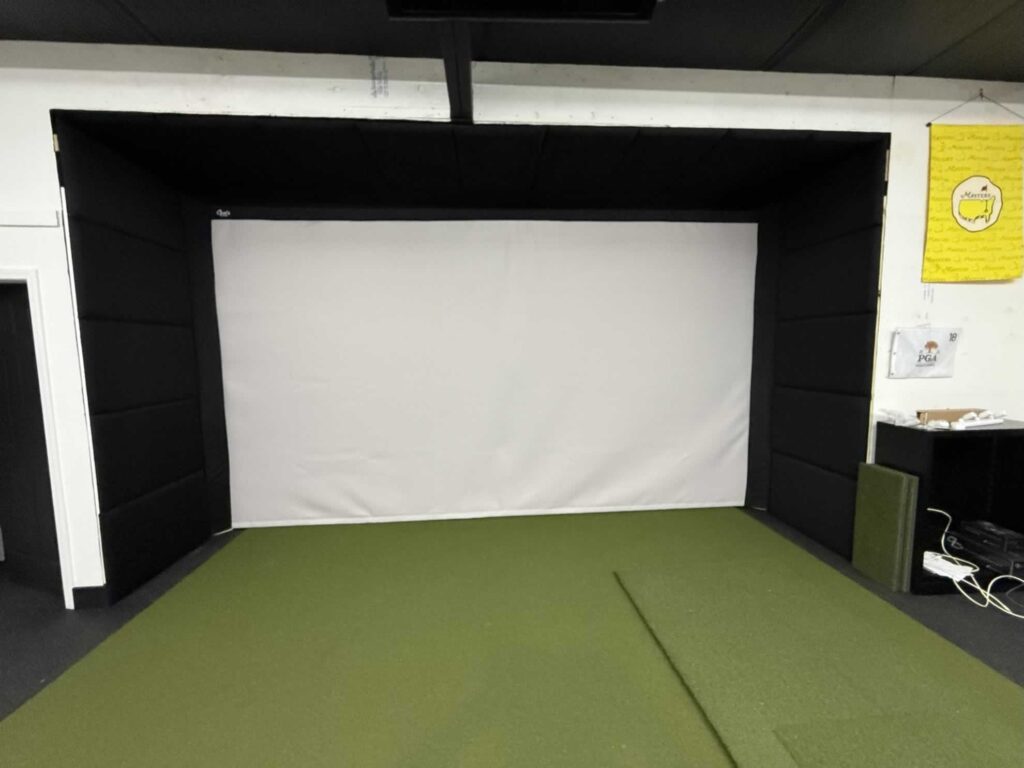
At my new simulator the build is different. I have plywood enclosure that I plan to attach the scree directly to and protect the walls and ceiling, somehow. Here is what I’m working with.
In my new simulator I built a large enclosure out of plywood. I am going to need to protect the ceiling of the enclosure first and foremost. Secondary protection would be nice along the right hand wall as that is where shanks will go (we are all right handed golfers). Thirdly and less importantly is my left hand wall of the enclosure.
I do not think I have had a ball hit my left hand wall in my current simulator even once since all of us are right handers, so protection on the left hand side is of less importance but I would like a uniform look.
If I can get it looking good enough to play sim golf in and shoot some videos, I’m good to go.
I want something that works well and does not break the bank. That often means DIY hacks and solutions. Above is my research and examples for inspiration. This is what I’ve found across the internet so far, I’m sure I will find more and add to them as I continue my search. Hopefully this can help you make the best choice possible.
My choices for wall protection?
I have not yet decided exactly what I will do, at least not at the time of hitting publish on this content.
I’ll come back to this guide and edit it in with links to what I chose for my sim as well as photo’s / videos of the install. I’m almost ready to pull the trigger on the wall padding solutions but I am still waiting for the internet to be connected at my new simulator and for my old simulator property to be ready to put on the market.
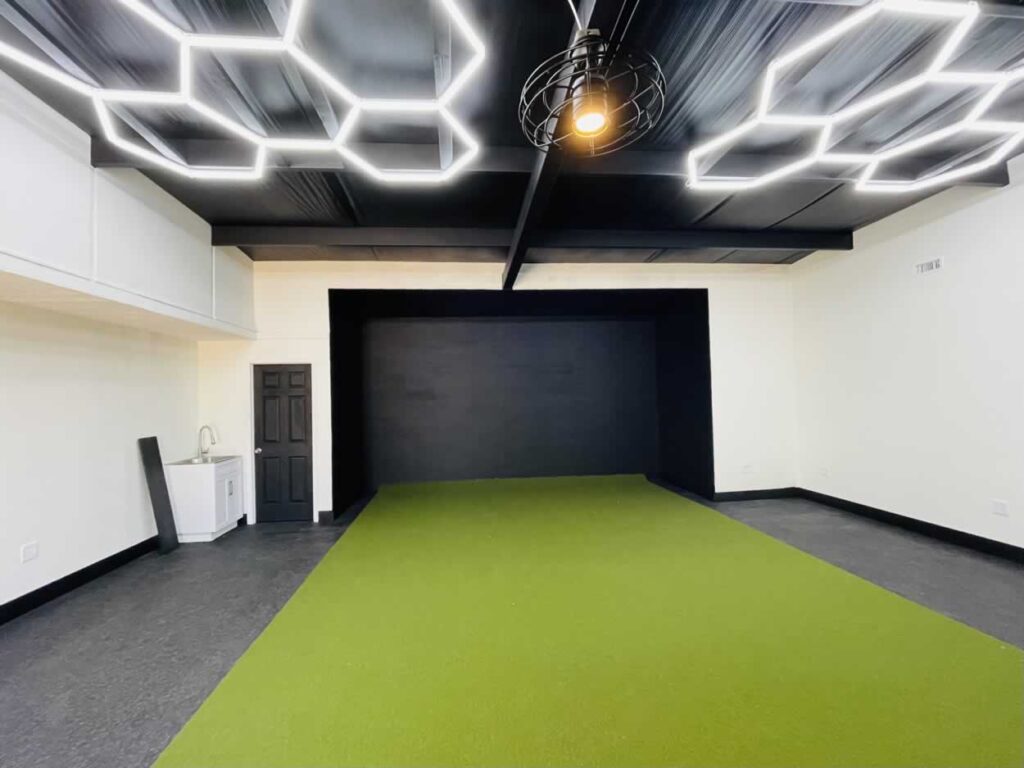
*update – I decided. I bit the bullet and went with the Carls custom golf room kit. My setup worked to fit exactly one of their panels and one starter panel around my hitting area. I am working on a full review – see my play sim golf youtube channel.
Keep On Reading
- 100 Different Golf Simulator Examples
- How my 1st simulator was built without an enclosure
- Budget Build Golf Simulator Price List and Guide
- Launch Monitors Compared
Hi There. This is great. I’m building my own SIM room now. Could you tell me which option you chose and if you had to do it over again if you would do it differently? Thank you!
I ended up going with the panels from Carls Place. You can see more in my gray impact screen review here https://onthegreen.golf/carls-gray-premium-impact-screen/ – I also put a couple of pictures of my setup up above!
If budget allows it, the kit from Carls makes it easy and is high quality. If you need to save every dollar I would go with an acoustic foam glued onto thick card board and then attach that to the walls. Gets it done for a fraction of the price and *probably* protects the walls pretty decently.